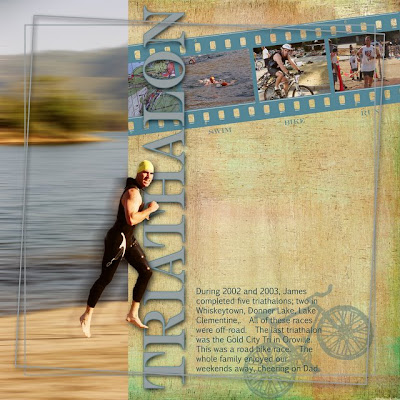
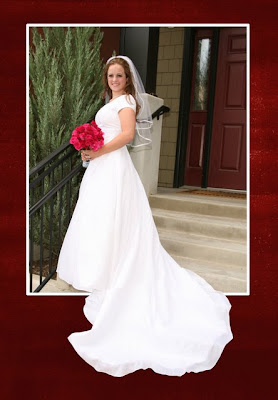
 Making part of your photo look like it’s coming out of the picture frame is a fun and easy technique that will make your page come alive! Thanks to my mom and friends, Londa and Alicia, for making some pages to help illustrate this. It really helps to have the right kind of picture, but once you do it will be amazing at how simple it is. Here are some steps to follow to do it right.
1. Place your photo on your canvas. It helps if you have a paper behind it or a colored background.
2. Select the area that you want to stick out of the frame. You can use the laso tool, magnetic laso tool works well with a photo of one color (like the wedding dress) or the quick selection tool. Set the feather to 1. Use your magnifying class to help you get a more precise selection. Here's a tip when following this procedure: When selecting the part to go outside the picture frame, choose a little more than you think you'll need. Then you'll be sure that there won't be any gaps between the outside element and your selection of the main picture.
Note: It is very helpful if you’ve got a handle on the selections tools first. Linda Sattgast has some excellent tutorials on her web site (www.scrappersguide.com), which are free if you’re premier member or $1 each if you’re not.
3. Press control+j to put the selection on its own layer.
4. Make sure you’re on your full picture layer again. Choose the marquee tool and draw a box around the part of the picture that is going to be in the frame. Get close to or right at the part you have already selected. Remember – use your space bar to help you reposition the square or oval when you’re doing it.
5. Press control+j again to put that selection on its own layer.
6. Click on the eyeball of the layer with the original picture to make it disappear. You may need to align it a little if it’s not right or redo #4. It takes a little guessing to make the selection areas match up when you’re doing step #4.
7. Click on the layer you made by using the marquee tool and go under edit>stroke outline selection and stroke the layer. Choose a color and set your pixels. Anywhere between 25-50 would be good. You could also use your own frame from a kit around it.
8. You’ll want to link (select all layers of the photo and click on the link symbol on top of the layers pallet}. You can also merge the layers under layers>merge layers. This will enable you to move it and resize it all together.
9. Try some shadows to see how they look!
Here are some other done by some of my friends:


1 comment:
When I get a great picture, I am going to try this. I hope I can figure it out. It is pretty neat.
Post a Comment