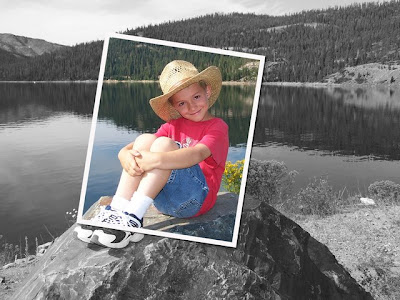


1. Choose a picture and put it on your canvas.
2. Press M for the marquee tool and draw a selection around the part you want to “pop.”
3. From the “select” menu choose “transform selection.” Put a tilt on the picture and move it around if desired. (Photoshop CS program only for this step)
4. Click Ctrl+J to put the selected picture on its own layer.
5. Put a 10 px white stroke around it
6. Add a drop shadow. You may have to adjust the shadow so it falls right side and bottom.
Now the fun begins: Click on the layer of your original picture. (Bottom layer) Try these different options, but this is only the beginning: (Use Ctrl+Z to erase your last move and try something else.) Under image>adjustments>desaturate to turn black
and white. Under filters>blur>radial, choose zoom with a value of 20
(or whatever you want).

1 comment:
Cool. One more thing to try. I can't keep up with your wealth of knowledge.
Post a Comment